


Description
Description
LatePoint Pro – Appointment Booking & Reservation plugin for WordPress + All Addons
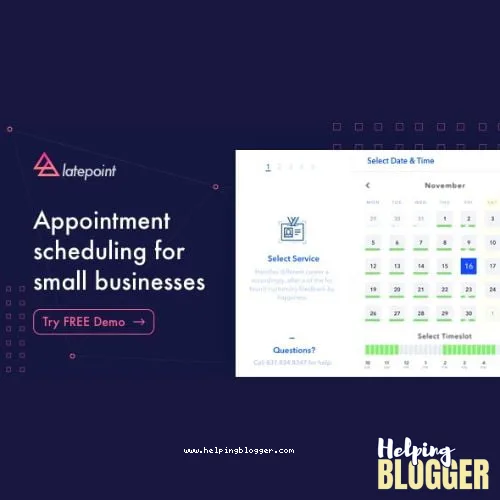
Are you tired of complicated booking software, that takes forever to setup, and once you do – it slows down your whole website making you lose your potential customers?
Meet LatePoint – our simple and intuitive appointment booking plugin that is focused on your customers, making it incredibly simple to schedule an appointment with just a couple of clicks.
We are experts in User Interface design, and with 15+ years of experience, tens of thousands of customers are using our products to improve their businesses.
LatePoint Addons List:
- Latepoint Google meet
- Latepoint Payment Squareup
- Latepoint SMS twilio
- Latepoint Google Calendar
- Latepoint coupons
- Latepoint payment braintree
- Latepoint group bookings
- Latepoint messages
- Latepoint payments razorpay
- Latepoint timezone selector
- Latepoint custom fields
- Latepoint payments paystack
- Latepoint payments stripe
- Latepoint payments flutterwave
- Latepoint webhooks
- Latepoint payments paypal
- Latepoint reminders
- Latepoint role manager
- Latepoint taxes
- Latepoint qr codes
- Latepoint service durations
- Latepoint service extras
- Latepoint zoom
- Latepoint Locations
Updates & Support
Updates:
-
If you purchase a product individually, you will receive 10 downloads per product, along with one year of future updates. After one year, the digital product files will no longer be accessible. If you use all 10 downloads within the one-year period, simply contact us and we will increase your download limit.
Note: This download limit is in place to maintain server performance and prevent unnecessary load or spam.
- We regularly update our products as soon as new versions are released. Once we are notified of an update, we download it directly from the author and upload the latest version to our website. However, if you find that a product is not up to date, you can request an update through our contact us page.
Support:-
- If you have any questions or need assistance with installing or configuring any digital products purchased from our website, feel free to contact us.
- Please note that we are not the original developers of these products, so our technical support is limited. We do not modify product functionality or resolve issues related to developer-side bugs.
WHY SO AFFORDABLE?
- All WordPress items, including themes and plugins, are licensed under the General Public License (GPL). This license allows redistribution once the product has been legally purchased.
- Your purchase helps us maintain our platform and acquire new products from third-party theme and plugin developers. This community-driven funding model keeps our costs low, allowing us to pass significant savings on to you.
- Please note that our products do not include premium developer support, which is why we are able to offer discounts of up to 95% on popular commercial WordPress themes and plugins.
HOW TO INSTALL/UPDATE?
How to Install/Update WordPress Themes/Plugins manually?
Click to watch Video Tutorial
Step 1: Purchase the product and download the ZIP file.
Note: Some ZIP files may need to be extracted before uploading.
If you are updating an existing theme or plugin, install the latest version and WordPress will automatically replace the older one. All your existing settings and customisation will remain unchanged.
Step 2: From your WordPress dashboard, go to Appearance → Themes if you’re installing a theme, or navigate to Plugins if you’re installing a plugin.
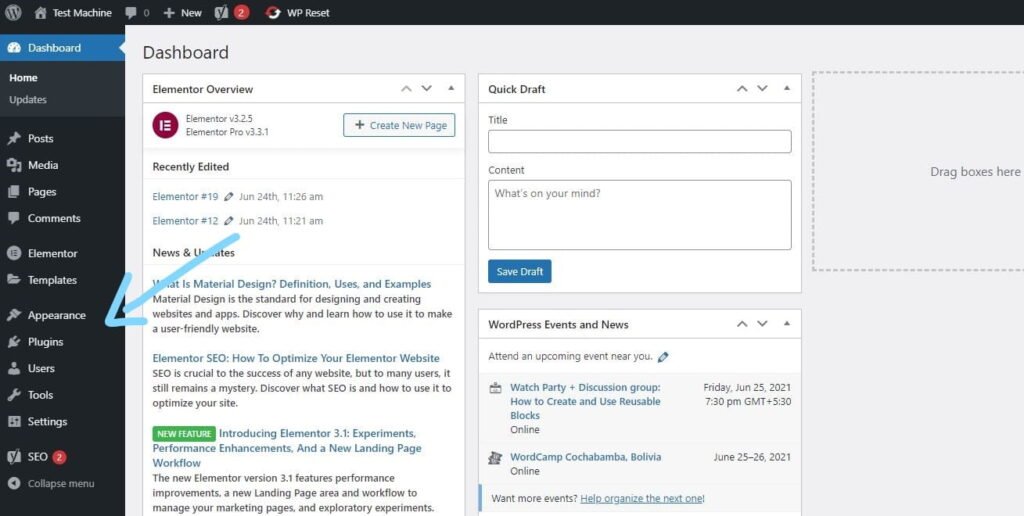
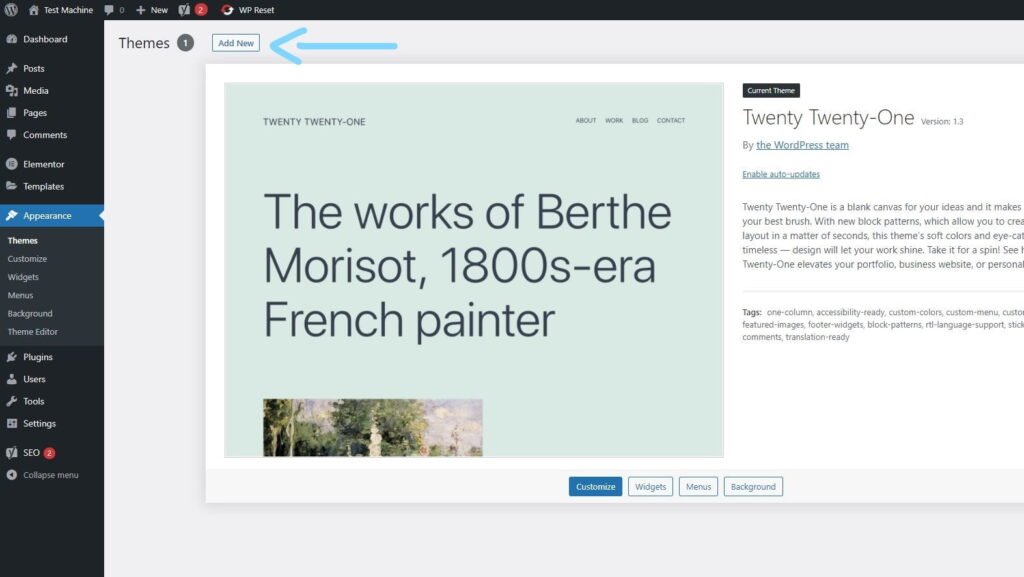
Step 3: Click the “Add New” button (this option is the same for both themes and plugins).
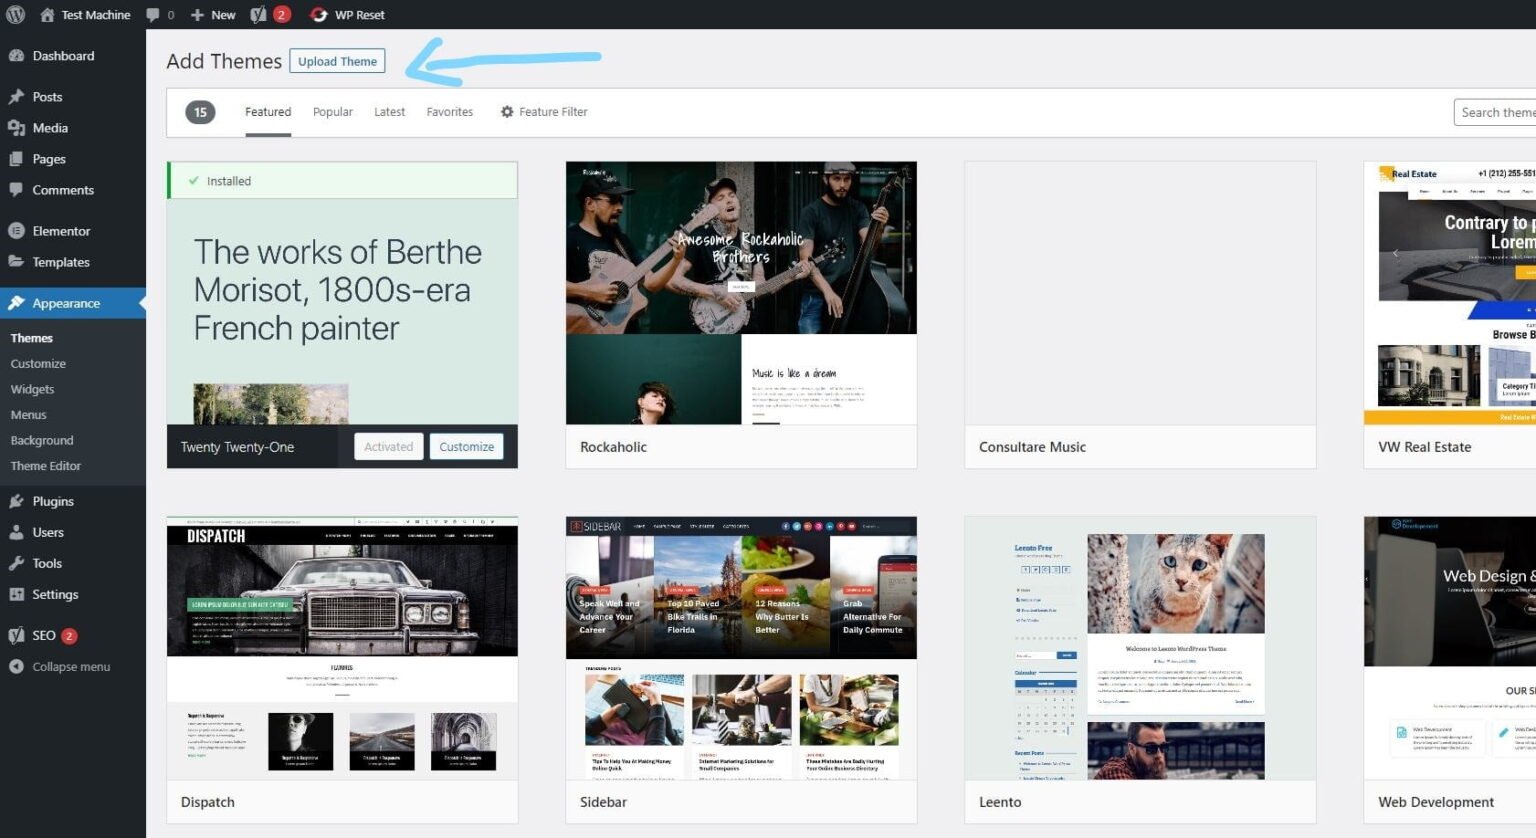
Step 4: Click “Upload Theme” if you’re installing a theme, or “Upload Plugin” if you’re in the plugins section.
Step 5: Click “Choose File” and select the ZIP file of the theme or plugin you want to install.
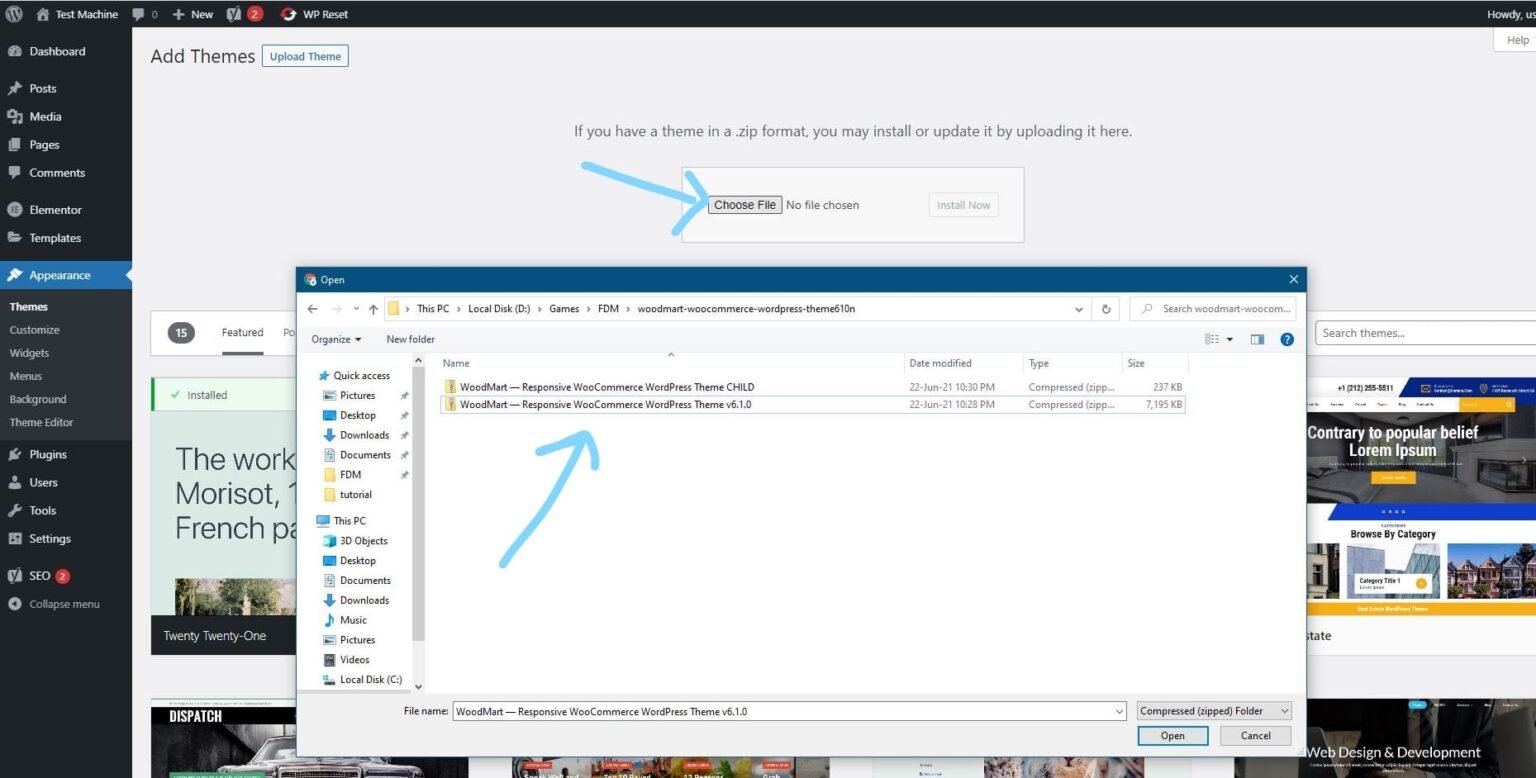
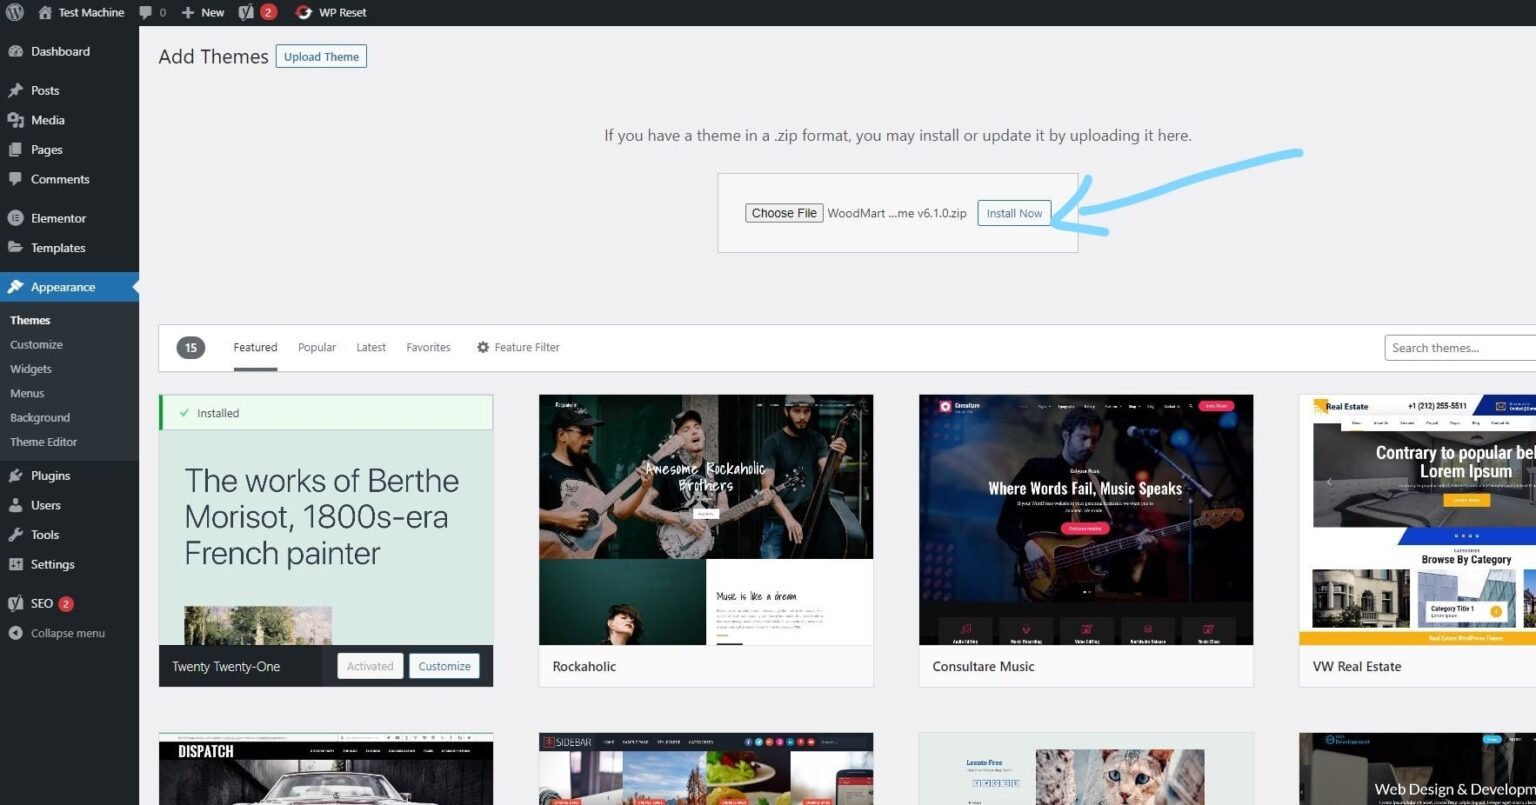
Step 6: Click “Install Now.”
Step 7: The installation process will take a few seconds to complete.
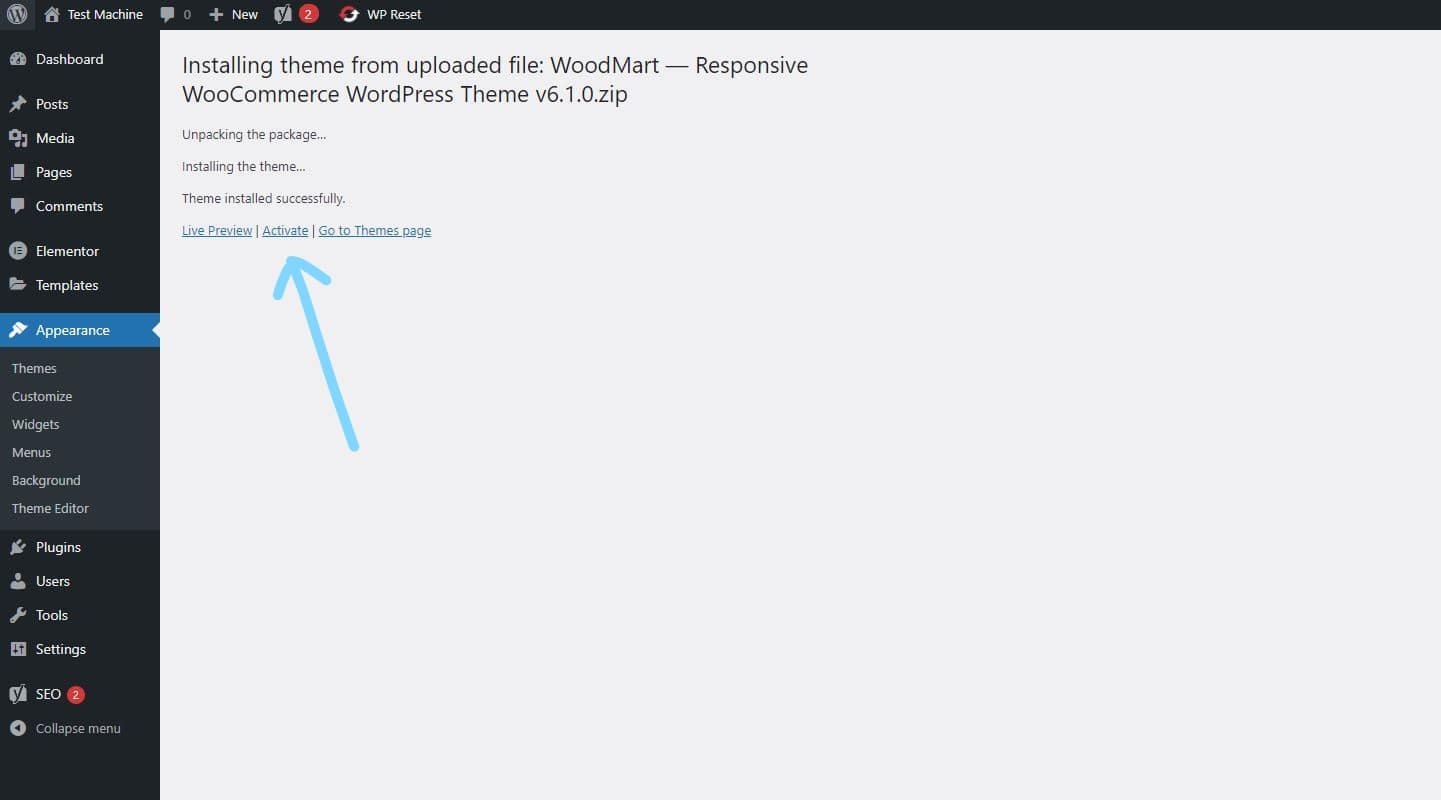
Step 8: Once the installation is complete, click “Activate” to manually activate your WordPress product.
How to Install Elementor Template Kits
Step 1: Download your template kit ZIP file. Do not unzip it.
Step 2: In WordPress, go to Settings → Permalinks and make sure Post Name is selected, then click Save.
Step 3: Navigate to Appearance → Themes → Add New and ensure Hello Elementor is installed and activated.
Step 4: If the theme prompts you to install the Elementor Page Builder plugin, click Install and then Activate.
Step 5: Go to Elementor → Settings, click the Features tab, and ensure the Flexbox Container shows a green icon. If not, set it to Active.
Step 6: Navigate to Plugins → Add New, search for Envato, and install and activate the Envato Elements – Photos & Elementor Templates plugin.
Note: If your kit requires Elementor Pro, make sure it is installed before continuing.
Step 7: Go to Elements → Installed Kits and click Upload Template Kit ZIP File. Your templates will now appear.
Step 8: Look for the orange banner at the top of the screen and click Install Requirements to load the necessary kit addons and settings.
That’s it! You’re now ready to start building your site.
-
Imported templates are stored in Elementor → Templates → Saved Templates and must be inserted into a new page in WordPress before customisation.
-
Imported blocks, tabs, or slides are also stored under Templates → Saved Templates and can be duplicated and customized directly.
-
Elementor Pro site parts are stored under Templates → Theme Builder and can be customized directly.
For detailed, step-by-step instructions with screenshots, copy and open the link below in a new tab.
How to Upload Install Elementor Template Kits from Themeforest to WordPress




Reviews
There are no reviews yet.